So when we first built the Coffin Family Theater 2.0, one of my biggest challenges was finding a screen that would get the job done.
When we planned the room we decided that the projector was going to go into an AV room directly behind the theater, this is rater common practice, it keeps the room cooler and quieter, but at the cost of a very long throw distance.
The farther from the screen a projector is, the less light it will produce, much like when you shine a flashlight into the dark, 2 ft in front of you it is bright like daytime, 20 ft away you cant really see.
So the premise is the same for home theater projection.
The farther you put the screen, the less lumens that will hit the target.
The way that you can compensate for this is with a high gain screen, I previously had a Da-Lite Pearlesence 2.8 gain screen, which was bright as the sun in a light treated room. Sadly the trade-off was losing the inky black levels that my JVC projector is so capable of producing.
What you get is super bright whites, but slightly grey blacks at the very best of times.
So in the age of 4k and HDR, it seemed like a logical step to find a more appropriately suited screen for the theater.
The problem I found sadly is, there is no high gain screens left on the market.
With projector manufacturers having better and better contrast and brightness, the screen industry moved away from making these high gain screens because now the projectors were doing that heavy lifting.
So after many days of searching and researching, I landed on the EluneVision ALR 4k NanoEdge screen.
With a gain of just 1.3, and being silver instead of white, I hoped and prayed it would get the job done, especially since the price tag was insanely high at $4830cdn.
Now before I get into the assembly review (spoiler alert – which was a nightmare), I will talk about the actual picture I get now.
In a word, it is outstanding.
The crispness and clearness of image in darkly lit scenes is amazing. Detail I simply could not see before because it was washed out, is now replaced with subtle black tones and shadow details.
Subtle shades in clouds in HDR will now pop off the screen. Neon lights contracts accurately again the pitch black of night in Ready Player One.
Color looks more natural and not nearly as washed out.
Now all of this is great and all, but getting to that stage, was an absolute mess.
The frame for the unit is made from machined aluminum and weights a ton, about 50lb all told for a 164″ screen.
There are 2 layers to the frame, the actual frame the screen attaches too, and then the nanoedge velvet frame that surrounds it.
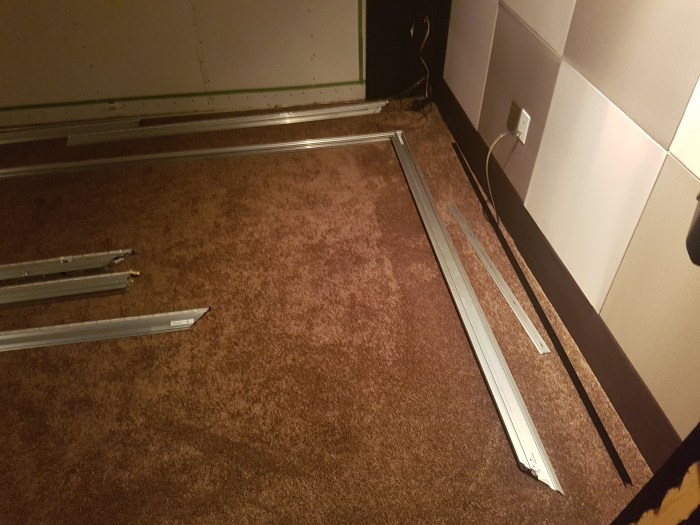
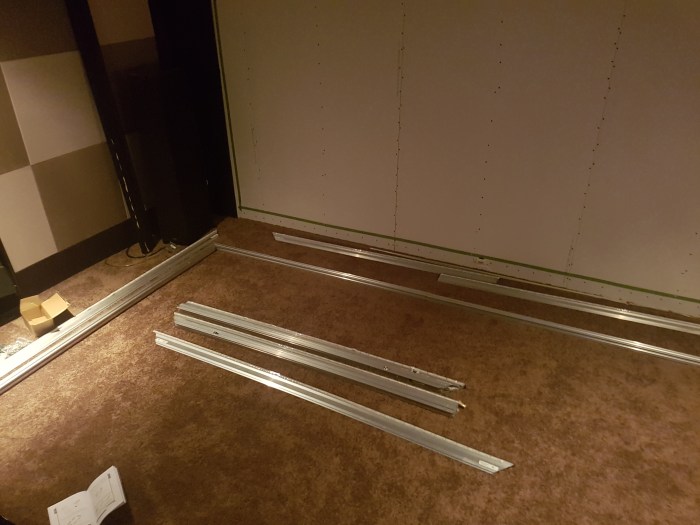

They both work in perfect harmony when installed right.
In my case, installing it right was not possible at all due to a manufacturing error, one that to this day, has not been corrected, and sadly i doubt will ever be. But more on that later.
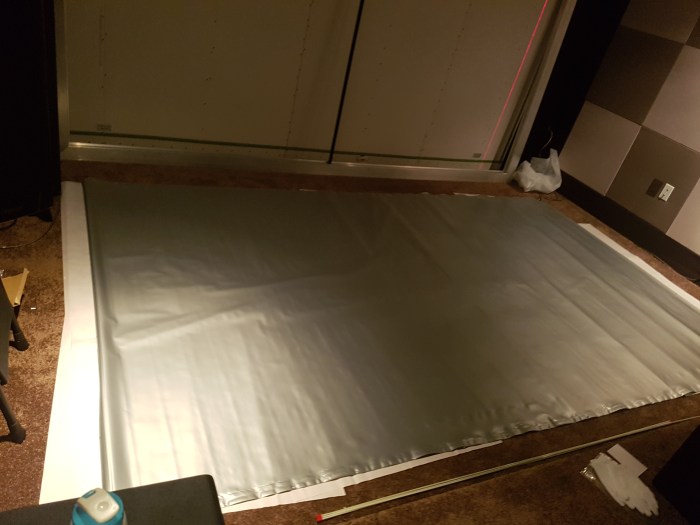
Once you assemble the frame, you have to tip it up, lay the screen material on the floor face down, then place the frame as carefully as possible on top of it.
This in and of itself is a very challenging 2 man job.

You must balance a 50lb, 7ft x 10ft frame over what is essentially the worlds most fragile rubber band, and place it down gently enough as to not scratch or crease it.
Once that pain is behind you, you must pull the screen with a little hook and put on tension springs to make it taut, think of it like stretching saran wrap over some leftovers, just way more tedious and annoying.
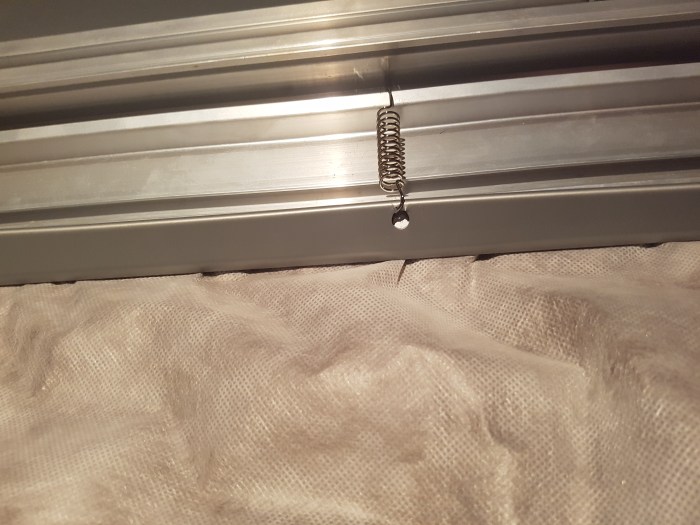

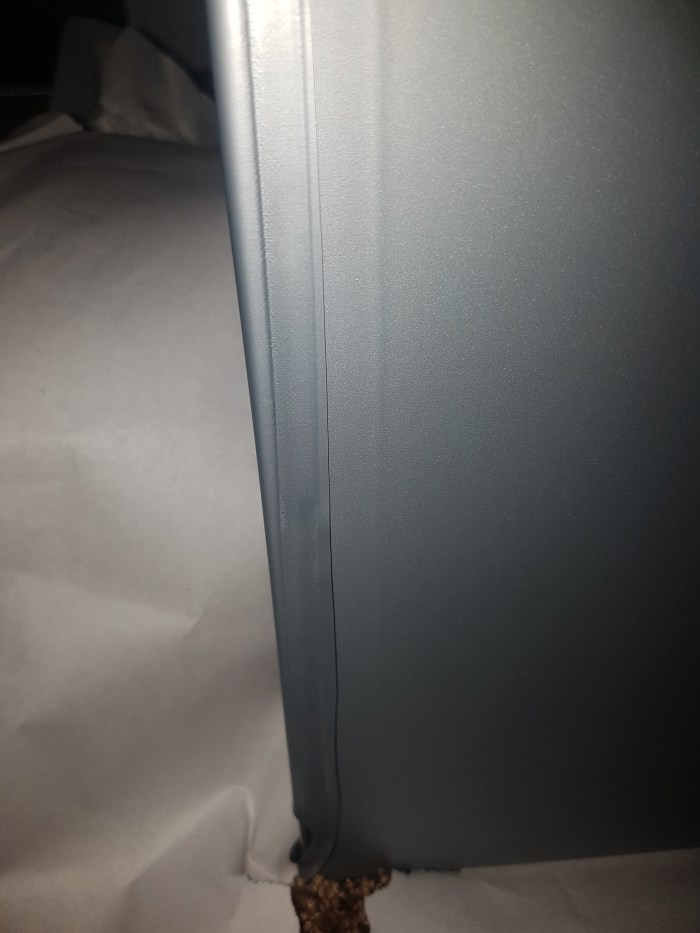
Now my problem came in what I can only assume was a manufacturing error. They did not make my screen as wide as it should have been. So while stretching top to bottom worked very easily, stretching it width wise took herculean strength, to the point that the material started to rip at the seams and corner.
And still once I pulled til I was blue in the face, it was not enough.

That little red knob should be up to the Velcro, missed the mark by about an inch on each side.
Now this may not have been such an issue had I been able to actually get the Nanoedge trim on, but the springs themselves were in the way of the secondary frame attaching. So there was no way to affix the velvet masking on the left and right sides.
What this left me with is the seamed edge showing on the face of the screen, completely unacceptable as this sticks out like a sore thumb when shooting an image on it.


At this point I contacted the shop who sold it to me, and they put me in touch with EluneVision support.
Who to this day, has not given me a solution, not a replacement piece of screen material.
They suggested I just pull it more… Which at this point is completely impossible. Over and over suggesting I installed it incorrectly…
Let me just say this thing is so tight you could use it as a trampoline, but that is hard to convey in pictures to a man at a desk 3000 miles away.
I jumped through a pile of hoops to do everything they suggested, from completely removing and re-tensioning the screen, none of which helped.
They finally just stopped returning my emails, leaving me with a $4830 problem to solve.
Not at all what I would expect from such a high end piece of AV equipment.
But lesson learned, never will I do business with these hacks again.
I had to come up with my own solution, which pretty much worked out to making my own black trim from plywood, 2×4’s and fabric on the left and right side.
Talk about a trailer trash fix to what should have been the Cadillac of screen.
Once everything was said and done, I am thrilled with the image I am getting, and that is all that matters now.
Just wish I had got what I paid for, instead of the sub par mess.
All I can hope for is that you dear readers, will see this and thing twice before picking up one of EluneVision’s screens.
You are much better off looking into Stewart or someone similar.

So sorry to hear you had a bad experience. I’m trying to get a sample of this material and that also seems impossible to do. Did you by chance notice any sparkling in bright highlights? A lot of high gain alr screens have sparkling to some extent. Like in skies or animation when the camera pans. Thank you if you can help me out.
LikeLike